Showing posts with label Cricut Art Philosophy. Show all posts

Wednesday, April 30, 2014

Lollydoodle Workshop On The Go ...

I had my monthly stamp club this past Saturday. My ladies wanted to use the Lollydoodle WOTG but wasn't sold on the layouts or actually how small the pictures were, so I changed it a little bit.


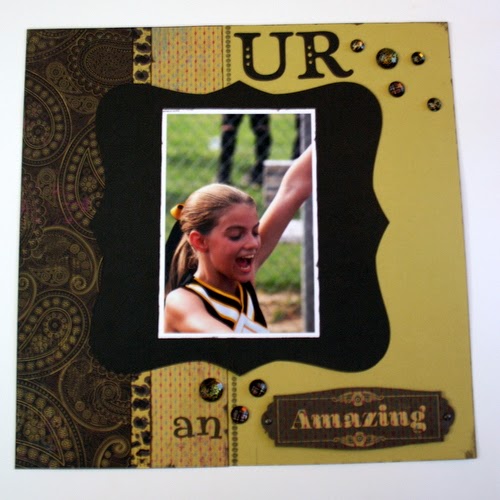
I loved the big frame they used in the WOTG layout so I incorporated that into my layout. I cut it using the Artiste Cricut Cartridge but thought it looked a little naked, so I pen-stitched around the edges. I love the effect that gave it. The finished product uses 2 4x6 pictures and 1 4x4 picture. Of course, you can always add more pictures by simply using our Flip Flaps.


I still wanted to use the exclusive stamp set that came with the Workshop on the Go because I have tons of pictures of my girls with their best friends.

The second layout I didn't the exclusive stamp set because I wanted to use it for some Easter pictures.I saw a layout on Pinterest that used small squares and a large center circle.  Instead I used the Artbooking Cricut Cartridge to cut out the title and the Art Philosophy Cricut Cartridge to cut out the large scalloped circle and the other circles. I used one of the "M' stamps called Colored Egg (only $2.95). You can color it in or do as I did and stamp it on patterned paper for instant decorative eggs.


Again, I tried to keep the pictures to 4x6 size with the exception of one that is 3x3.


I always forget to take pictures during our stamp clubs to show you but this time I finally remembered. Right now we are meeting at my friend Sandi's scrapbook room. Look at all her stuff! She used to own the Scrapbook Store here in town. She couldn't stay with us so she's not in the pictures.


Next month we will be using the Ariana Workshop on the Go kit. Let me know if you are interested in joining us.


Thursday, September 19, 2013

Stamp Club layouts- Laughing Lola WOTG and Tommy

We will be meeting on the 28th of this month for our monthly Stamp Club meeting and will be creating the following layout...


This was made using the Laughing Lola Workshop On The Go...can you believe it? This layout was based on the layout on page 18 of the Autumn/Winter Idea Book. You can see it below.


There was way too much purple on it for my personal taste and I knew for a couple of other ladies also so I reworked it using the Laughing Lola Gold instead for my background. Once I started putting papers together, I keep thinking that this looked like "Yellow Jacket" colors so I figured I could use it for some of  Gaby's cheerleading pictures that are still not scrapbooked.  I am happy with the way it turned out even though it kinda took on a life of it's own.


Items used:

I have a bad habit of NOT posting the completed Stamp Club pages and so here is LAST month's layout using the Tommy Paper Packet and co coordinating Stickease stickers.


Can you believe we did this layout without any stamping? We copied the Studio J layout from the Spring/Summer 2013 Idea Book but used the Stickease Stickers to complete it.


Items used:

Saturday, September 7, 2013

Create with Cricut® Collections


Enhance the artist within you by cutting and assembling foundational shapes, 3-D items, and themed mini books with Close To My Heart's stunning Cricut® Collections! With limitless options for shapes, themes, and sizes, our Cricut® Collections will bring you hours of exciting creative sessions.


Friday, September 21, 2012

Another door prize: Christmas Gift Tags and box

This is the 2nd post today so be sure and scroll down to see both posts.
Here is another cute item that I have donated as a door prize for tomorrow's crop.
I first saw this on Vicki Wiznuik's blog called Wizard's Hangout back in 2009 and saved it to my computer but didn't make it until this past week. LOL! How's that for being on the ball?

The stamp set she used, Just For The Holidays is retired now but I went ahead and used it since it had not seen ink at all yet. You could very easily use the New stamp set Perfect Fit - Holidays or Countdown instead.


I again used the Cricut Art Philosophy cartridge to cut out 48 circles at 1 1/2", I stamped the images on 32 circles in both cranberry and olive ink so I could cut out specific parts to make them colorful. I also stamped "to" and "from" on the remaining 16 cirles and glued to the back of the tags.


You can find the tutorial for making the box and cover here. Here's a close-up of the different tags I made.


Supplies used (All CTMH unless otherwise noted):
Just For The Holidays stamp set (retired)
Other: Transparency for clear cover, ribbon from my stash

Door Prize: Card box and cards

Boy have I been in a crafting mood lately. I know,,, I know. You thought all I did anymore was just post the latest videos from Close To My Heart and Blog Hops. And that was all for the last little while. My scrapbook room was in such a mess and I could barely walk into it much less create. So slowly but surely, I have been cleaning it and have found stamps I had forgotten about. (I will post pictures of my newfound clean stamp room later). This is just the first post of several that will actually showcase my stamping artwork.

Anyway, back to this post. My church sponsors a crop every year as a fundraiser called Crop Queens. I normally give some extra stamp sets or paper packets as door prizes but this year I decided to make some special projects.

Isn't this the cutest thing?

This was totally CASED from a fellow consultant, Aaron Brown. I have had her artwork saved on my computer for a while but just hadn't gotten around to making it. She is so talented and is one of my "go-to" bloggers for inspiration. You can see her original post here.


The bracket card was cut out using CTMH's Art Philosophy Cricut cartridge at 4". I also cut out the box using the same cartridge at 9.1/2" and matching envelopes at 4 1/2". I fil 4 cards with envelopes in the box although I probably could have fit a couple more in there.


Just like Aaron's example, I decorated the outside of the box with some stamped leaves from the exclusive stamp set that came with the Art Philosopy cartridge, Celebrations.


Supplies used ( All CTMH unless otherwise noted):
Dreamin' Paper Packet (retired from Autumn/ Winter 2011 Idea Book)


Monday, October 31, 2011

Birthday Weekend and last days of Cricut Shape-A-Day

Sorry, this is a long post.

We had a busy weekend this past weekend celebrating two birthdays…my youngest daughter, Cassidy’s 12th birthday and my oldest grandson, Chandler’s 8th birthday.

Cassidy’s birthday was Friday, October 28th. We celebrated it with just a small family dinner at Western Sizzlin’.

IMG_1166

The girl loves zebra print…from her outfit to her cake!

IMG_1179

Davis managed to get cake all over his face.

IMG_1189

Opening presents… 

Chandler wearing beads as earrings.

IMG_1205

My nephew Trevor carried this balloon around all night. 

IMG_1194

I took a picture and told him I was going to post it on facebook…

IMG_1196

What? LOL! I love that expression on his face.

On Saturday night, we went to Ashley’s house to celebrate Chandler’s 8th birthday. It doesn’t seem like he should be that old already. We enjoyed chili and crab stew before having cupcakes.

IMG_1214

The cupcakes were delicious! They were pumpkin cupcakes with cream cheese frosting…Yum, yum.

IMG_1216

Then it was time to open presents!

And the last presents were in Chandler’s words…”Heaven in a box”. He got new clear Wii controls.

IMG_1232

_____________________________________________________________

And now the final days of Jeanette’s Shape-A-Day projects…

Shape-a-Day_26

Day 26

Shape-a-Day_27

Day 27

Shape-a-Day_28

Day 28

Shape-a-Day_29

Day 29

Shape-a-Day_30

Day 30

31-Oct

Day 31

If you are interested in purchasing the Art Philosophy cartridge, you can order here.     

Thursday, October 27, 2011

Cricut Shape-A-Day; Day 14 and more

Yeah, yeah, yeah…I know. I have been a bad girl and haven’t posted in a while. All I can say is that “Life” got in the way. I hope you have been able to go to Jeanette’s blog and see them anyway but if not, here they are…

Shape-a-Day_14

Day 14

Shape-a-Day_15

Day 15

Shape-a-Day_16

Day 16

Shape-a-Day_17

Day 17

Shape-a-Day_18

Day 18

Shape-a-Day_19

Day 19

Shape-a-Day_20

Day 20

Shape-a-Day_21

Day 21

Shape-a-Day_22

Day 22

Shape-a-Day_23

Day 23

Shape-a-Day_24

Day 24

Shape-a-Day_25

Day 25

I think that catches me up for now. Look out for more!